


In an age where visuals reign supreme—whether you’re a professional photographer, a small‑business owner crafting marketing materials, or simply someone who treasures high‑quality vacation snaps—knowing your image’s resolution is non‑negotiable. Resolution dictates clarity: too few pixels, and your image looks blurry or pixelated; just the right amount, and it pops with sharp detail. In this guide, we’ll walk you through how to uncover the pixel dimensions and DPI of your images on Macs, Windows PCs, iPhones, and Android devices—so you can always share, print, or store photos at their best.
Why Resolution Matters
Before diving into the “how,” let’s cover the “why.”
- Print Readiness: Sharp posters, brochures, and flyers demand at least 300 DPI (dots per inch). Anything less, and your printed image risks looking soft.
- Web Performance: Want to balance crisp images with fast page loads? Knowing your image’s dimensions helps you compress or resize for optimal speed without sacrificing quality.
- Storage Management: High‑resolution images can eat up gigabytes. Checking resolution lets you decide when to archive, compress, or delete files to keep your digital library lean.
- Professional Standards: Graphic designers, marketers, and content creators rely on precise resolution data to maintain brand consistency and meet publication requirements.

On a Mac: Two Quick Methods
1. Finder’s “Get Info” Window
- Locate your image in Finder.
- Select the file and press Command + I.
- In the Get Info panel, expand More Info to view the Dimensions (e.g., 4000 × 3000 pixels).

2. Preview’s Inspector Tool
- Right‑click your image and choose Open With → Preview.
- From the menu bar, go to Tools → Show Inspector (or press Command + I).
- In the Inspector window’s General tab, you’ll see Image Dimensions and Resolution (DPI).

On Windows PC: Two Simple Options
1. File Properties
- Right‑click your image in File Explorer and choose Properties.
- Switch to the Details tab.
- Under Image, read off the Width, Height, and sometimes Horizontal/Vertical Resolution (DPI).

2. Microsoft Paint
- Open the image in Paint (Right‑click → Open With → Paint).
- Click File → Properties.
- A dialog displays the Width, Height (pixels), and Resolution (DPI).
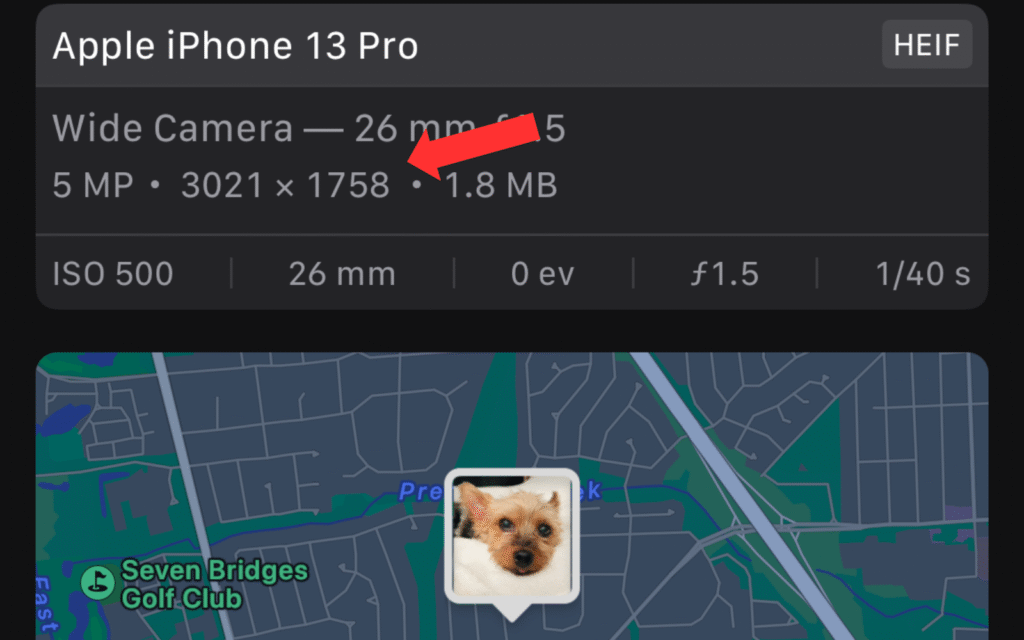
On iPhone: View Resolution in Photos
- Launch the Photos app and open your image.
- Tap the Share icon (a box with an upward arrow).
- Scroll down and tap the Info (“i”) button.
- Here, you’ll find Dimensions (e.g., 3024 × 4032 pixels).
Note: Apple’s image viewer doesn’t show DPI, but most iPhone photos default to 72 DPI for screen use. For print‑ready files, export via a third‑party app that preserves metadata.

On Android: Inspect Through the Gallery
- Open your device’s Gallery or Photos app and select the image.
- Tap the menu icon (often three dots or lines).
- Choose Details or Info.
- You’ll see Dimensions (pixels), file size, and sometimes file path.
Pro Tip: If your built‑in viewer lacks DPI info, try a free app like Photo Exif Editor to reveal full metadata, including resolution and DPI.
Understanding the Numbers
- Pixel Dimensions (e.g., 3000 × 2000) tell you how many pixels make up the width and height.
- DPI (Dots Per Inch) relates pixels to real‑world inches—vital for print. Aim for 300 DPI for sharp, professional prints; 72 DPI suffices for digital displays.
A higher pixel count means you can enlarge images without losing detail. For example, a 4000 × 3000‑pixel image can print at roughly 13 × 10 inches at 300 DPI—perfect for a glossy photo frame.
Bringing It All Together
Armed with these quick checks, you can manage your images like a pro:
- Select your strongest shots for print by verifying 300 DPI or higher.
- Resize for social media without bloating page load times.
- Archive low‑resolution files that no longer meet your needs.
Because every pixel counts, taking a minute to confirm resolution can save hours of frustration down the road. Whether you’re polishing your photography portfolio, crafting eye‑catching marketing brochures, or simply sharing vacation snapshots with friends, these steps ensure you always deliver crisp, clear images—no matter the device.
Remember: A picture truly does paint a thousand words—but only if its resolution is up to the task. Keep this guide handy, and let every image shine at its fullest potential.

